Friday, June 1, 2018

So You Want To Shoot ... Seven Tips and Tricks for Anyone with a Camera Phone or a Point and Shoot

Today as the internet and social media are saturated with pictures, it seems that more people than ever (Myself included!) have become interested in taking better pictures. And really, why not? Whether you want to improve photos for your work or social media accounts, capture memories of your children's fast-changing lives, or even snap a few pictures in your garden or on vacation, photography is a skill that everyone can enjoy.

So, for this post I wanted to focus on seven easy tricks that anyone who has a camera phone, a point-and-shoot or even a DSLR (a digital camera that changes lenses) in 'auto mode' can use to instantly improve their photos. Most of these photos came from my own iPhone 6.
I must warn, that once you get started, and are bit by the shutterbug, your life will never be the same again! Consider yourself warned. :)

#1 My first trick is simple: 
Shoot Outdoors or Near a Window 
A nice, shady location outside is best. Overcast days should become your new best friend! Camera phones don't do as well with indoor light because, well, there isn't as much of it. Less light means your camera has to slow its shutter speed or increase its ISO (a technical phrase basically referring to the amount of light your camera's sensor detects) and both of these actions decrease the quality of your pictures. 


But, when you shoot outside, those little camera phones work pretty well.
(Warning! Shooting outside does not mean to place your poor subject in direct sunlight. Unless of course, you want to make his/her eyes squinty and bloodshot and end your photoshoot in a meltdown. Been there. Instead, try to find a nice shaded location without a lot of light in the background and shoot away!)


Also, if going outside is not an option, just head towards a window. If the sun isn't direct, you can use it as is (see bottom right picture below), but if the sun is shining brightly through the window, lower the blind a bit, or pull a curtain or shade in front of it (see bottom left picture below). The point is to allow more light to enter your camera. This will improve you pictures a lot.


#2 Okay, so trick number two: 
Declutter Your Background
Whether you are shooting indoors or outside, this is a big one. It's amazing how much better a photo of your little one will look without that pile of laundry in the background, or an open laptop, or a garbage can, ect. It seems a little finicky, but it really does make such a difference. Just take a second before you click that shutter to scan your background and make sure it looks clear. That's about it for this one!


#3 Trick number three:
Stand Back and Zoom In
This is one of my favorite little tricks. Why? Well, have you even seen a picture where the subject seems to really pop and the background is all fuzzy and soft? They are gorgeous, right? Well, the easiest way to get that look without changing lenses and reprograming aperture levels (more technical stuff) is to stand back and zoom in. It naturally creates a more shallow depth of field and takes your picture from "point and shoot" to "portrait". That's it! Stand back and zoom in. 


One note, this works much better in well lit areas, so when possible do this outside or near a window!

#4 Trick number four: 
The Rule of Thirds
This trick comes naturally with a little practice and it really works wonders. Essentially, when you crop your image, pretend that there are two lines vertically dissecting the image into thirds and two lines horizontally dissecting the image into thirds like this:


What you want to do, is make sure the subject of your picture falls along the line of one of those thirds. Top line, bottom line, either side, doesn't matter, but if the subject falls in place where two of those lines meet, you get extra points! It's all about where the viewer's eye will naturally be drawn. Here are a few examples:


One last thing. When using this 'Rule of Thirds', it's a good idea to give your subject plenty of space to look into, like this: 


All of this may sound confusing, but I bet if you start paying attention to it, (This rule is used in the movies all the time!) it will become an easy habit very quickly.


#5 Okay, trick number five: 
Focus on the Eyes
For any kind of portrait, whether it be human, animal or ... umm ... I guess even a potato, the trick is to focus on the eyes. Crisp eyes make or break a portrait. Push that little focus button on your camera screen directly over the face/eyes of your subject and your images will look very nice. 'Nuff said.


#6 Trick number six: 
Steady Hands
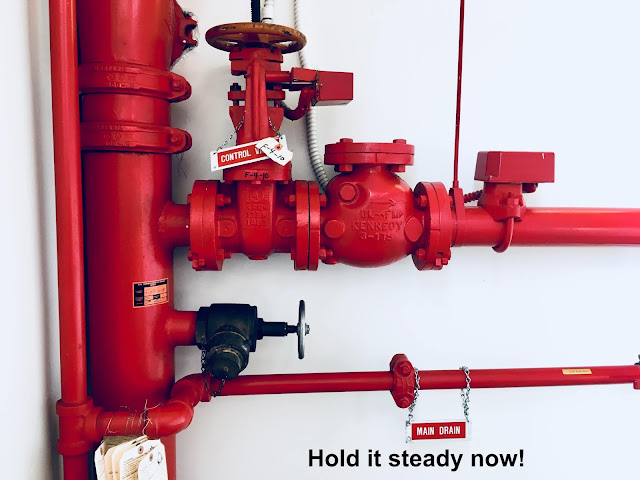
This one is pretty basic. If your hands are moving all over the place, the picture will be fuzzy, so hold those hands as still as possible, especially when you are in low light situations. Freeze and shoot!


#7 Finally, trick number seven (this one is mainly for camera phones):
Make Use of your Phone's Photo Editing Program

As far as basic editing programs go, your camera (I use an iPhone 6) will most likely have a decent little editing program. To edit your pictures with a camera phone, simply click on the image and push the "edit" button in the top righthand corner of the photo you've selected. You'll see a number of options along the bottom of your screen which will allow you to crop, filter, adjust light and even mark up the picture to your little heart's content! Play around with it, and not only with the filters. Adjust your shadows and highlights and play with the colors or contrast or lighting and see what you come up with. It can actually be a lot of fun!


I hope this little list of tricks helps you feel more confidant with taking pictures! I'll be sure to post more tutorials in the future, but for now, go on out and have some fun with your camera, and please comment below with any of your favorite tips I may have left out!
Thursday, May 17, 2018

The Royal Greenhouses of Laeken

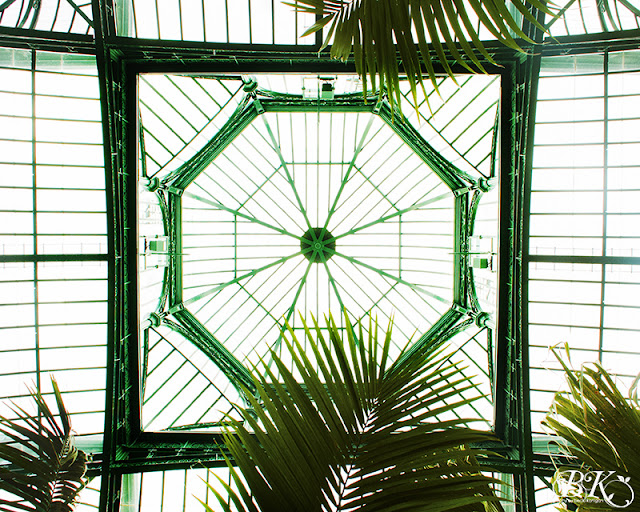
These gorgeous greenhouses are only open to the Belgian public three weeks out of the year every spring and I was able to make it there on the very last day. Just in time! This post will be very short. I'll let the pictures speak for themselves.

Also, see my family blog for our recent shots from the beautiful medieval city of Ghent!

www.kaniganfamily.blogspot.com


Wednesday, May 2, 2018

Photoshop: Phony?

I hear and read so many different soapboxes (from clients, family and even random strangers online) about the obsession our society today has with Photoshop. In my personal experience, I've found that some clients love it, and will even request that I help them take off ten pounds ... or a mole ... or a scar ... while others seem repelled by it, as though changing an image in any way is as abhorrent as cheating on a final exam.  While I completely understand the frustration with over-adjustments (Can someone please help me understand the current obsession with Snapchat and human-kitty faces please?!) I have to stand up and say a word about why I, as a photographer use Photoshop on a regular basis and why I have no shame about it whatsoever.

 I have to put it out there, that I like a very natural style with my portraiture. I want my images to express what I really see in front of me. Staging a picture is one thing, but finding the authenticity in my subject's expressions is my goal. When I get it right, it feels almost magical. They are the kind of images I hope my clients will return to again and again, just to remember what life held for them at that particular moment. It makes sense then that in my use of Photoshop, I try to make my images look as natural as possible. It needs to look effortless, which can actually be a lot of work.

 If you were to commission a painter to paint a portrait of your family, you would expect that painter to show everyone in their best form. Say you had one child going through puberty, with acne all over, you would be fine with the painter omitting the zits and painting him with a better complexion, right?(I'd sure hope so anyway or your child might not be too happy with you!) You wouldn't be purchasing an exact replica of your family, you would be purchasing a memory. A memory of your family at that moment in time and you would want everyone to be depicted looking their best.

As a photographer and an artist, I try to do the same thing. I look at every family I work with (even when it is my own) as a sort of blank canvass. I don't always know what my finished product will be exactly, but as we spend time together, I look for those little personality traits that are unique and special and I try to capture them all. Because I prefer a very natural, realistic feel to my pictures, I try to treat my sessions like a get-together where we relax and hang out and the kids feel comfortable with me before I start clicking away. Once I do, I shoot everything I see that feels genuine and real. The crying, the laughing, the hugging, the excited looks on little faces when they learn that we are done ... everything.

It is after the shoot, after the chasing and walking and posing and smile-coaxing that the real work begins. It is where I whip out my "paintbrushes" in Photoshop and figure out what I've got and how I'm going to present it all in the best possible way to make the kind of memories my clients will not only like, but want to hold on to. Memories that paint a story, not just a picture. I brighten and lighten, and sharpen and add the kind of contrast and mood the pictures ask for until finally, I feel I've found a memory perfectly preserved. If that memory shows Mom with a slightly slimmer waste, or Dad with one less chin, I'm okay with that. If the bags under the eyes need a little more lightening up, I'm okay with that too. I don't see it as perjury at all, I see it as a beautiful, memorable form of art.

So, with that being the case, it must be said, that unless the information is specifically requested of me by a client, what happens in Photoshop, stays in Photoshop!

You won't hear a word from me about it. :)


Thursday, March 8, 2018

Newborn Photo Sessions - To Shoot, or Not to Shoot?

Pardon the cliché Hamlet line, but this question, when it applies to newborn photo sessions, is one that 'once upon a time' I too was faced with. Now, as a parent/photographer with teenagers (pause to sniffle) I approach it with a completely different perspective than I once did.

For me, starting out with little ones (before I was bitten by the photo bug), I remember waiting until my babies were three months old before taking them in to be photographed. My reasoning was that by that time, they looked more like themselves. I guess I felt that newborns were still a bit ... well, new. Their skinny, wrinkly little bodies needed time to plump up before they looked more like their true selves. They changed so quickly. It's funny how that same argument is exactly why I now hold the opposite point of view.

 I have four children. Once they were scrawny little monsters running around the house eating jam straight from jars and climbing to the top of the piano if not constantly watched. I had three boys first, and then a little girl. With my boys, I waited to have their pictures made until they were three months old. I thought that was just fine, but when I had my daughter, a dear friend in Huntsville, Alabama (http://agreenfieldphotography.com/blog/) offered to do a newborn shoot for me. I jumped at the chance and brought my daughter to her when she was only five days old. Her chord hadn't even come off yet. Before you cringe, I have to say that those pictures, my daughter's first days on this planet, are more special to me than any other pictures I had taken, or have taken myself. Ever. Because she changed so quickly, I look back at those beginnings with awe and love and humility at how far she has come. I really wish I had done the same with my boys.

Raising kids is about change. Constant, never ending, change. Because your little person is going to change so quickly, capturing those first moments, within the first week or two, is so important!

So, there you have it. To shoot or not to shoot? Shoot. Absolutely. Is it a waste of time and money? I can promise you, it definitely is not. Find a photographer who matches your style and don't hesitate. Life moves so quickly. You will always be happy you did.

Here are a few simple newborn shots I took recently of a five-day-old angel:


My Thousand Words

Ten years ago my husband and I made the decision to leave everything we knew and find out what the world had in store for us. It was not an easy decision - the road less traveled - I guess you could call it. I began to realize then and even more so now, how quickly time passes.

Eight years ago, I discovered a new love. A way for me to hold on to time even for just a split-second.

Photography is more than just taking pictures. For me it is a way to freeze a moment so that ten years down the road - when I have nearly forgotten it - I can stumble on an image and experience that moment again.

They say a picture is worth a thousand words, and the images you'll find here and on my gallery site are mine. Thank you for visiting.

Followers

About Me

My photo
About five years ago, my husband and I decided it was time to take our family on a little adventure. In consequence, he accepted a job with the U.S. State Department and we've been traveling the world ever since. Our small-town 'Alabama babies' had the world thrust upon them as we moved from Washington D.C. to Rio de Janeiro, Brazil and then on to Manila, Philippines. Life abroad is full of ups and downs, but the experiences we've gained are priceless. As we approach another move, (This time to Belgium!) I feel a desire to share some of these experiences (good and bad) with you all. The most important help for me in surviving this "exciting" life we have chosen, has been to learn the art of being flexible. Things rarely turn out the way we plan, but that's okay. We are learning to take things in stride and doing our best to enjoy the ride!